You should make special note in the image below of the code I've used to create
image attributes.

The first attribute is
title, but replacing the word title with
alt works just as well. This is important for the indexing of your images by search engines. Spiders cannot 'see' the image when they crawl your page. The 'title' or 'alt' attribute is your way of telling the spiders what's going on in the picture, how you want them to index that image, your post, and your site properly.
This is an extremely important attribute for SEO. If you're selling from your blog, you might want to add a picture of a product, say a book. In order for the picture, and your site, to come up on searches for this book you'll need to be specific in the 'title' attribute. If you title it
book your image will get lost amongst the millions of images called book on the Internet.
I've told the spiders exactly what this image is and how I want it indexed by using the book's title and author's name in the title attribute.

Now, roll your cursor over the image. This is an added benefit to alt and title attributes. The title pops up when you scroll over the image. I can then link either the picture itself or text to the URL of my review of the book.
The second attribute is target=blank. Because I've linked my image to another website I am, in effect, sending readers away from my page when they click the link. In order to allow them to remain on my page, and still see the page I've linked, I've added the target blank attribute. This code added to an image makes the link open in a new window keeping your reader on your site.
The title, alt and target = blank attributes can be added to text links as well, in the same area that you add them to an image. They have the same effect of opening the link in a new window, helping spiders index the topic of your post, and creating a scroll-over title. **The scroll over attribute doesn't work in
Firefox. Only in IE.
Labels: Blog Tips, Blogger, How to, Illustrated, Instructions, Templates
Save time by setting permanent links in each post.
Or Add awesome image signatures and links to posts!
These simple step by step instructions, with images, will guide you through the process of creating a blog signature or a set of links that will automatically publish with each new post on Blogger. **Click pictures to enlarge**
The first step is getting the graphics for your signature.
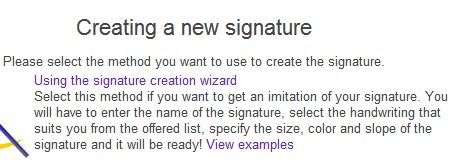
You can use a picture of yourself. An avatar. You can create a text graphic signature using any graphics program or you can create a custom signature by visiting
mylivesignature.com Select the
signature creation wizard to create your signature.
Once you have saved the graphic signature as an image you can copy paste the code. No need to host the image on your own server!
This is my signature. I've changed the URL in the code to go to my home page.

Once you have the graphics you want to use you're ready to create a permanent signature and links in each post.
This method is called
pre-formatting a post template. Using this method the code will already be inside your text editor whenever you click
New Post. You can decide with each post where you want it to appear, as a footer, as a header, at the head or end of each post.
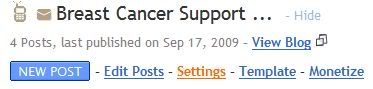
To begin: Go to your
Blogger Dashboard.
Find the blog you want to add the signature and links to and click
Settings.
This takes you inside the
blog dashboard.
Click
Formatting.
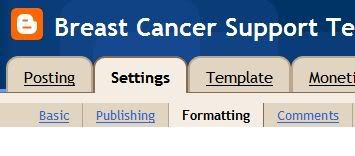
Scroll to the bottom of the Formatting page.
You'll see the empty box that reads
Post Template.

This is the area where you'll insert the text and html to create permanent links in each post. ** Keep in mind that you should add the html (line breaks, non-breaking spaces, etc) right in this window so you won't have to bother with placement again.
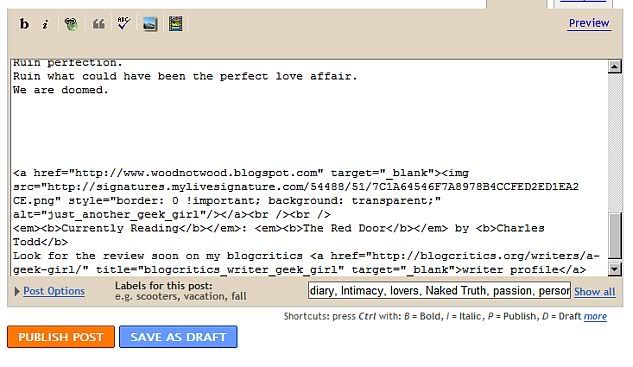
In the jpeg below you can see that I've added the signature code that links to my home page as well as a text link to my
writer's profile on Blogcritics.org. I've decided to use
Currently Reading to keep readers updated on the next book that I'll be reviewing.

I blindly added line breaks when I first put the code in, just to break up each element, then I edited it later. There is no preview on the
Post Template Formatting page. I'll explain how to do it further down.
You should make special note in the image below of the code I've used to create
image attributes.
The first attribute is
title, but replacing the word 'title' with
alt works just as well. This is important for the indexing of your images by search engines. You can read more about it on
Using Images As Links How Spiders Read Your Page
Once you've inserted your signature, images, and links into the
post editor you need to click the SAVE button just below it. If your adding a lot of links you might want to click
SAVE as you work so you don't run the risk of losing what you've already added.
When you're finished adding everything and you've hit SAVE, you should click on
POSTING and then
Create New. As soon as the post window opens you should see everything you added in the POST TEMPLATE already inside.

Now you have the option to use it as a header or to start typing above it and use it as a footer as I have.
 Editing the Post Template
:
As I said before, there is no preview for POST TEMPLATE so you'll have to open a new post and then hit preview to see how it looks. I usually adjust everything right there in the post window until it looks just as I desire. Next I (control c) copy all of it and save the post in draft as 'post template' (just in case). Then I go back into Formatting to the Post Template and delete everything out of it. I click in the window and then (control v) paste the edited version into it. I click SAVE again, go into posting and open a New Post. Now I can hit preview and make sure that everything got transfered correctly into the Post Template.
The last step in editing cannot be done until you actually publish a post. As you know the Post Window is usually larger than your actual blog template. You'll have to wait until a post goes live to see if you need to make any final adjustments.
Once you've got your Post Template set perfectly you won't have touch it again until you decide to change the links or images.
You can see my live footer on
woodnotwood
Another Useful Blogging Tip: You can use the Post Template as a place holder for links that you change often. If you want to change ads with each post, feature other blogs, link to articles on other sites or perhaps even to a related post on your own site you can add the empty html in the Post Template and just fill in the link text and URL each time you get ready to post.
If you post your content on different sites on the Internet or re-publish your older posts you should take certain precautions to insure that search engines don't see your site as part of a SPAMblog network. Read this post Avoiding Duplicate Content Penalties for more information.
Labels: Blog Tips, Blogger, Footer, Links, Post, Templates
The templates for
Going Pink For October were created from classic Blogger templates. That means that you'll have to
revert back to old blogger in order to use them.
For some of us, that's not such a bad thing. I, myself, prefer the old blogger because I can have more control over my layout. I can add links or anything else that I like to the blog without having to rely on the restrictive widgets that are being used in New Blogger.
**Tip One: Click on images to enlarge them for a better view of the dashboard interface as it should look to you.
Warning: Images will open in a new window.
**Tip Two: You can use a keyboard shortcut to copy or to paste.
Holding down the control button on your keyboard hit the letter c to copy.
Holding down the control button on your keyboard hit the letter v to paste.
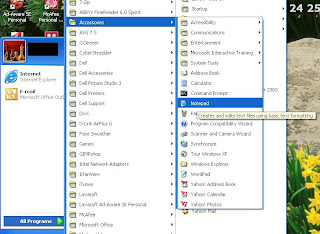
Step One:The first step in switching back to old blogger is a step you should use whenever you are doing anything with your template. That is to open 'notepad' so you can copy anything you need to and also to save a back-up copy of the new template.
Simply go to the Start button on your computer.
Click on programs.
Click on accessories.
Then click on Notepad (Do
Not use Word! It reads html, what you need is strictly plain text.)
Click on image to enlarge. It will open in a new window.
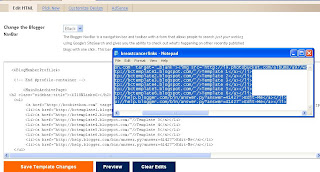
You'll want to give your notepad a name. I usually use blogname_date so I can easily find the most recent copy of my template in case I decide to revert back to it.
You'll need a copy of your sidebar and links so that you can add them back to the new template. Personally I consider it a useful tip to always keep an updated copy of everything on the sidebar in a notepad on my computer. Unfortunately the new blogger doesn't offer a way to do this so it must be done manually.
This is what my notepad looks like.
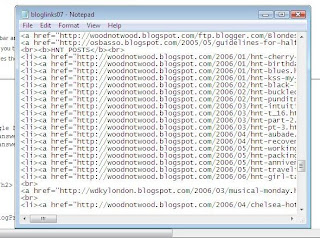
This contains all of the links, images, etc. so that I can have easy access to them if I ever delete my blog or decide to move it elsewhere.
Step Two: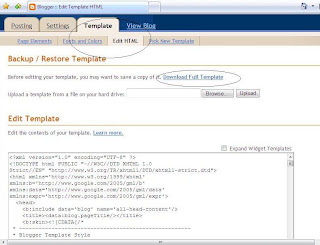
Go to your Blogger Dashboard.
Click on the blog you want to change.
Click 'Template'.
Click 'Edit HTML'.
At this point it's a good idea to let blogger make a back up for you.
Click 'Download Full Template' and save the copy in your documents.
You'll need this copy when you decide to go back to it.
*The 'Going Pink' templates are just for the month of October so most of you will want to put your blog back just as it was when the month is over.
Step Three: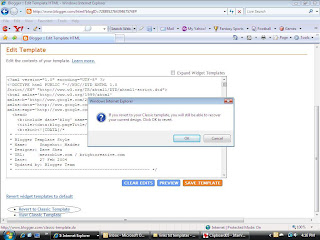
Go to the bottom of the edit html page and click 'Revert to Classic Template'.
You'll get a warning pop-up.
Click 'Okay'.
Your template will now open up as 'Old Blogger'.
Step Four:At this point you'll need open on your desktop:
Blogger Template.
Notepad with all of your links and sidebar information.
Notepad with a copy of the template you are going to add.
Delete everything from inside the template box.
Open the notepad with your new template.
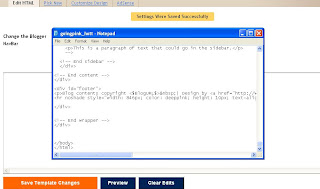
Click 'Edit' on the Notepad.
Click 'Select All' from the drop down list.
This will highlight everything on the page.
Click 'Edit' again.
Click 'Copy'.
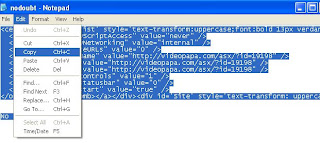
Now all of the text is copied to your clipboard.
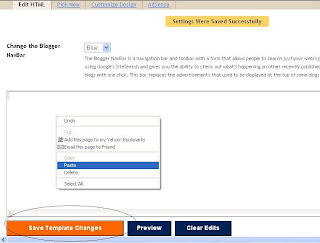
Right Click in the template window.
This will open a drop down list.
Select 'Paste'.
All of the text from the notepad should now appear in the template window.
If it isn't, do the copy and paste again.
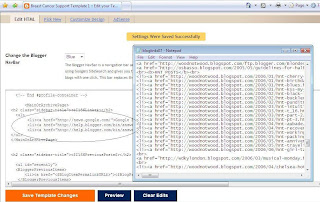
Once the text is in the template click 'Save Template Changes' at the bottom of the template. You should get a message saying 'Settings were saved successfully'.
Step Five:Now click 'Preview'. (Next to 'Save Template Changes').
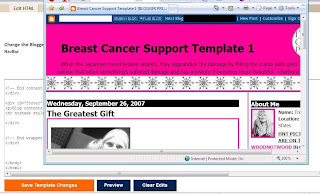
You'll want to keep the preview page available from this point so you can check your changes as you work.
Now it's time to add your sidebar, links and customize the template.
Remember that it's a good idea, when you add something, a picture etc., to hit preview and make sure that it looks right before you hit the 'Save Template Changes' button.
Open your notepad with your links and sidebar information in it.
This is going to be an exercise in copy/paste ;)
This shows you where you are going to add your links and also represents how to add all of your elements to your sidebar.
You can see in the screen shot where the links should go.
Use your mouse to highlight the links and then hit backspace on your keyboard.
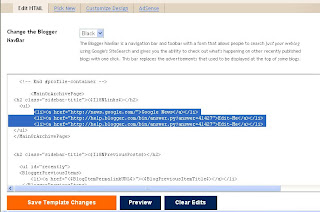
This will delete them.
Now, on your notepad, scroll and highlight your links. Copy them to your clipboard, hit edit and copy from the dropdown list (as you did in step 4, but without hitting the 'select all' option). Or you can use the keyboard shortcut and hold down the control button while hitting c.
Click the place on your template where the links should be.
Hold down the control key on your keyboard and hit the letter v at the same time. This is a keyboard shortcut to paste.
Your link list should now appear in the template at the same place you clicked.
Now it's important that you hit 'preview' to make sure that the links appear as you would like them. Sometimes an image or button may be too large and it will knock the entire sidebar to the bottom of the page. You can adjust the size manually by adding width and height instructions to the code like this

When you see in the preview that everything looks right you can hit Save Template Changes. Or if you don't like it and you want to start over you can hit 'clear edits' and it will remove everything you just did.
**Just remember to hit 'Save Template Changes every time you are satisfied with how it looks; if you make a lot of changes and then hit 'Clear Edits' it is going to clear every change you made since the last time you saved.
You can now continue on adding elements to the sidebar the same way you changed your links.
Step Six:The last thing you should do before you close the template is make a full copy of it in the notepad that you opened with the blogname_date. Now you have a back-up copy of everything including any new links so you can use them later when you revert back to your original template.
Step Seven:Changing your template back to New Blogger.
When the time comes to change back to your original template you need to Click on 'Customize Design' in the dashboard.
A dialogue box will open up asking if you want to upgrade your template.
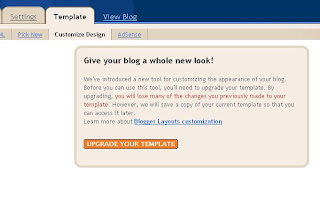
Click 'Upgrade your template'.
This will open to a template selection page.
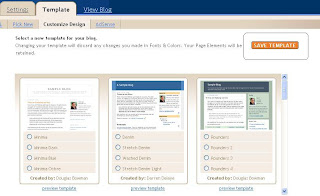
Do not select a template.
Click 'Save Template'.
This should take you back to the the New Blogger Dashboard.
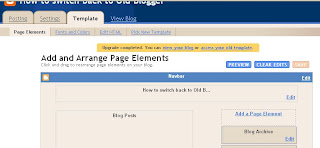
View your blog to make sure that the old widgets are where they should be.
If they're not click on Edit HTML.
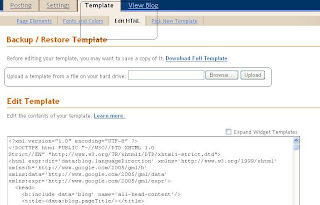
You can use the Upload to browse upload the backup template that blogger created for you in step 2.
Labels: Back Up, Blogger, Classic Blogger, FREE BLOGGER TEMPLATES, How to, Illustrated, Old Blogger Interface, Revert
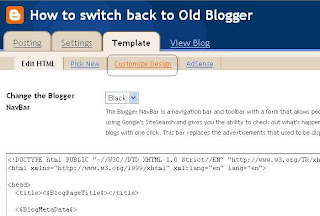
See Post above for instructions on
how to switch or revert template to Old Blogger Dashboard.
Step Seven:Changing your template back to New Blogger.
When the time comes to change back to your original template you need to Click on 'Customize Design' in the dashboard.
A dialogue box will open up asking if you want to upgrade your template.
Click 'Upgrade your template'.
This will open to a template selection page.
Do not select a template.Click 'Save Template'.
This should take you back to the the New Blogger Dashboard.
View your blog to make sure that the old widgets are where they should be.
If something went wrong and your widgets are not there, click on Edit HTML.
You can use the 'Upload a template from file' to browse and upload the
back-up template that Blogger created for you in
STEP 2.
Labels: Back Up, Blogger, Classic Blogger, How to, Illustrated, Instructions, New blogger, Templates