Switching back to Classic Blogger
The templates for Going Pink For October were created from classic Blogger templates. That means that you'll have to revert back to old blogger in order to use them.For some of us, that's not such a bad thing. I, myself, prefer the old blogger because I can have more control over my layout. I can add links or anything else that I like to the blog without having to rely on the restrictive widgets that are being used in New Blogger.
**Tip One: Click on images to enlarge them for a better view of the dashboard interface as it should look to you. Warning: Images will open in a new window.
**Tip Two: You can use a keyboard shortcut to copy or to paste.
Holding down the control button on your keyboard hit the letter c to copy.
Holding down the control button on your keyboard hit the letter v to paste.
Step One:
The first step in switching back to old blogger is a step you should use whenever you are doing anything with your template. That is to open 'notepad' so you can copy anything you need to and also to save a back-up copy of the new template.
Simply go to the Start button on your computer.
Click on programs.
Click on accessories.
Then click on Notepad (Do Not use Word! It reads html, what you need is strictly plain text.)
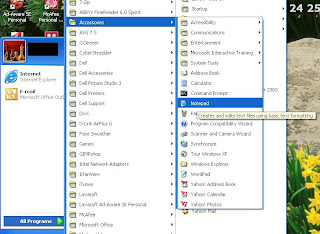
Click on image to enlarge. It will open in a new window.
You'll want to give your notepad a name. I usually use blogname_date so I can easily find the most recent copy of my template in case I decide to revert back to it.
You'll need a copy of your sidebar and links so that you can add them back to the new template. Personally I consider it a useful tip to always keep an updated copy of everything on the sidebar in a notepad on my computer. Unfortunately the new blogger doesn't offer a way to do this so it must be done manually.
This is what my notepad looks like.
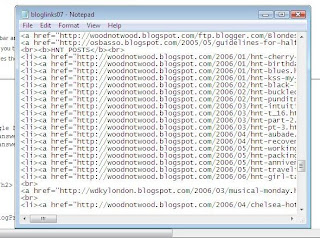
This contains all of the links, images, etc. so that I can have easy access to them if I ever delete my blog or decide to move it elsewhere.
Step Two:
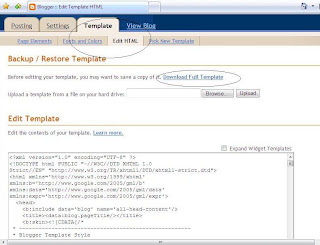
Go to your Blogger Dashboard.
Click on the blog you want to change.
Click 'Template'.
Click 'Edit HTML'.
At this point it's a good idea to let blogger make a back up for you.
Click 'Download Full Template' and save the copy in your documents.
You'll need this copy when you decide to go back to it.
*The 'Going Pink' templates are just for the month of October so most of you will want to put your blog back just as it was when the month is over.
Step Three:
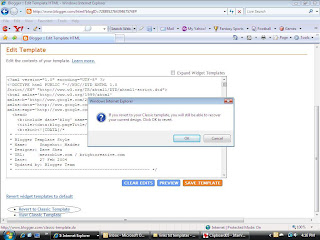
Go to the bottom of the edit html page and click 'Revert to Classic Template'.
You'll get a warning pop-up.
Click 'Okay'.
Your template will now open up as 'Old Blogger'.
Step Four:
At this point you'll need open on your desktop:
- Blogger Template.
Notepad with all of your links and sidebar information.
Notepad with a copy of the template you are going to add.
Delete everything from inside the template box.
Open the notepad with your new template.
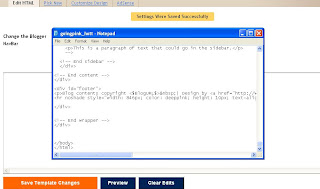
Click 'Edit' on the Notepad.
Click 'Select All' from the drop down list.
This will highlight everything on the page.
Click 'Edit' again.
Click 'Copy'.
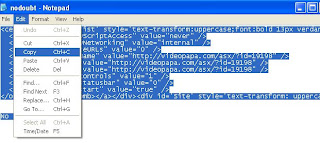
Now all of the text is copied to your clipboard.
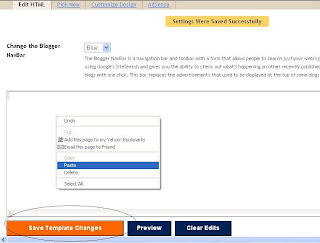
Right Click in the template window.
This will open a drop down list.
Select 'Paste'.
All of the text from the notepad should now appear in the template window.
If it isn't, do the copy and paste again.
Once the text is in the template click 'Save Template Changes' at the bottom of the template. You should get a message saying 'Settings were saved successfully'.
Step Five:
Now click 'Preview'. (Next to 'Save Template Changes').
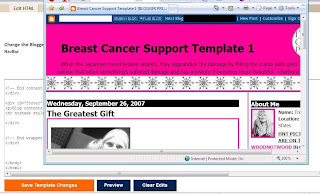
You'll want to keep the preview page available from this point so you can check your changes as you work.
Now it's time to add your sidebar, links and customize the template.
Remember that it's a good idea, when you add something, a picture etc., to hit preview and make sure that it looks right before you hit the 'Save Template Changes' button.
Open your notepad with your links and sidebar information in it.
This is going to be an exercise in copy/paste ;)
This shows you where you are going to add your links and also represents how to add all of your elements to your sidebar.
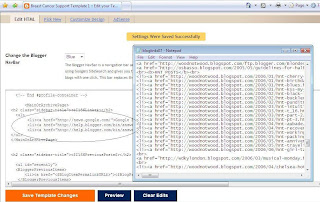
You can see in the screen shot where the links should go.
Use your mouse to highlight the links and then hit backspace on your keyboard.
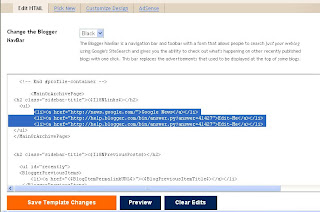
This will delete them.
Now, on your notepad, scroll and highlight your links. Copy them to your clipboard, hit edit and copy from the dropdown list (as you did in step 4, but without hitting the 'select all' option). Or you can use the keyboard shortcut and hold down the control button while hitting c.
Click the place on your template where the links should be.
Hold down the control key on your keyboard and hit the letter v at the same time. This is a keyboard shortcut to paste.
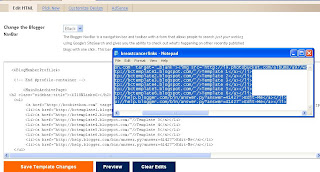
Your link list should now appear in the template at the same place you clicked.
Now it's important that you hit 'preview' to make sure that the links appear as you would like them. Sometimes an image or button may be too large and it will knock the entire sidebar to the bottom of the page. You can adjust the size manually by adding width and height instructions to the code like this

When you see in the preview that everything looks right you can hit Save Template Changes. Or if you don't like it and you want to start over you can hit 'clear edits' and it will remove everything you just did.
**Just remember to hit 'Save Template Changes every time you are satisfied with how it looks; if you make a lot of changes and then hit 'Clear Edits' it is going to clear every change you made since the last time you saved.
You can now continue on adding elements to the sidebar the same way you changed your links.
Step Six:
The last thing you should do before you close the template is make a full copy of it in the notepad that you opened with the blogname_date. Now you have a back-up copy of everything including any new links so you can use them later when you revert back to your original template.
Step Seven:
Changing your template back to New Blogger.
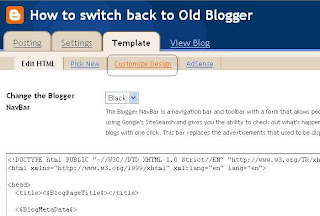
When the time comes to change back to your original template you need to Click on 'Customize Design' in the dashboard.
A dialogue box will open up asking if you want to upgrade your template.
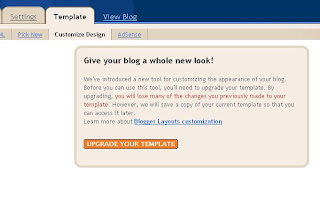
Click 'Upgrade your template'.
This will open to a template selection page.
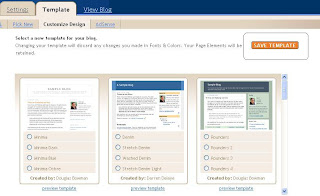
Do not select a template.
Click 'Save Template'.
This should take you back to the the New Blogger Dashboard.
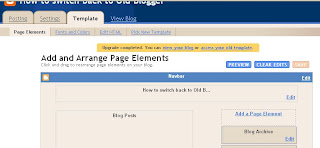
View your blog to make sure that the old widgets are where they should be.
If they're not click on Edit HTML.
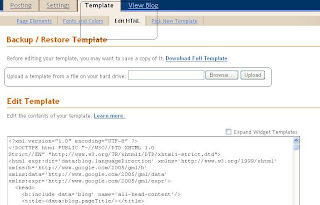
You can use the Upload to browse upload the backup template that blogger created for you in step 2.
Labels: Back Up, Blogger, Classic Blogger, FREE BLOGGER TEMPLATES, How to, Illustrated, Old Blogger Interface, Revert


